
Beginner’s Guide to Sewing an Invisible Zipper
Invisible zippers are easy to insert into a seam, “invisible” and make any handmade garment look professional. I’ll be honest… Though I’ve been sewing for a number of years, I only recently learned how to sew an invisible zipper the proper way. They are definitely my favorite garment closures now, and I’ve been buying them in bulk (<– affiliate link!) because I want to sew them all the time!
Invisible Zipper Foot Attachment
Before getting started, it’s always best to have an invisible zipper foot for your sewing machine. A universal invisible zipper kit (<– affiliate link!) includes attachments to fit virtually any machine whether it is high or low shank, and works really well! Another alternative is to find an invisible zipper attachment for your specific machine.
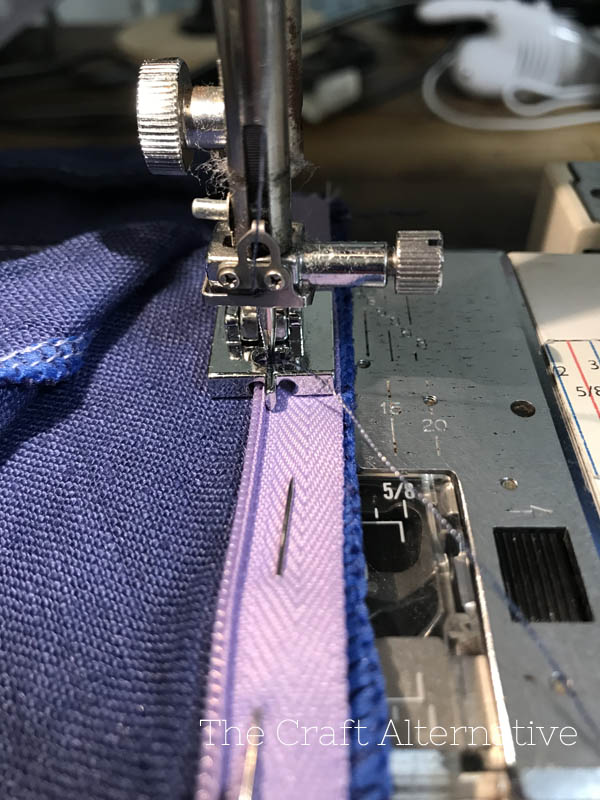
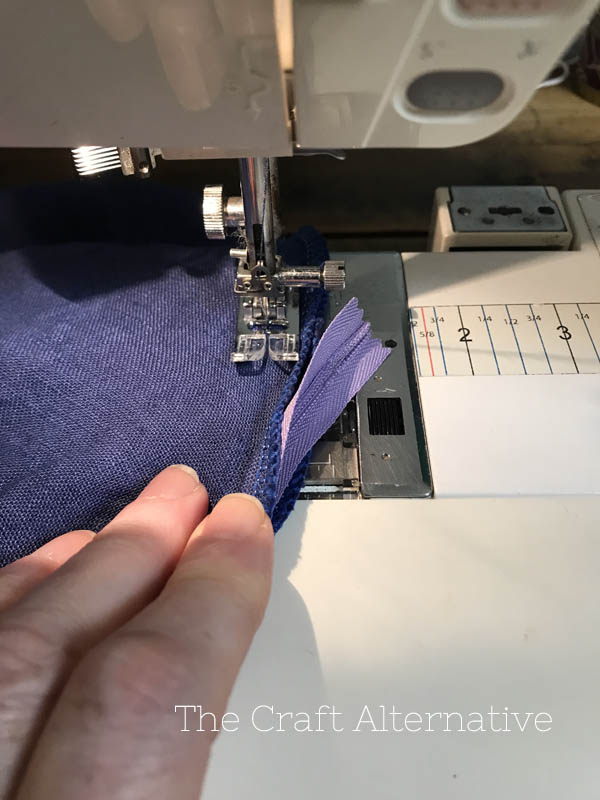
I use the invisible zipper foot specific to my machine and align the needle with the center of the foot. On either side in the center is a splitter (see photo) which allows clearance for the teeth while the zipper is being sewn. The teeth will go under one section of the roller – either to the left of the needle or to the right. In other words when you’re ready to sew the zipper in, the edge of the garment is to the right with the teeth of the zipper facing the left.
Prepping the Garment and Zipper
So, let’s say you’re going to insert the zipper into the side seam of a skirt. The sides of the skirt can be serged or zig-zagged to keep the edges from fraying but they do not need to be sewn together yet.
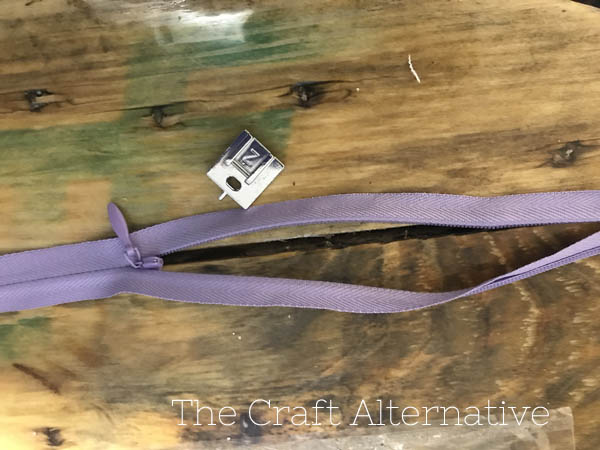
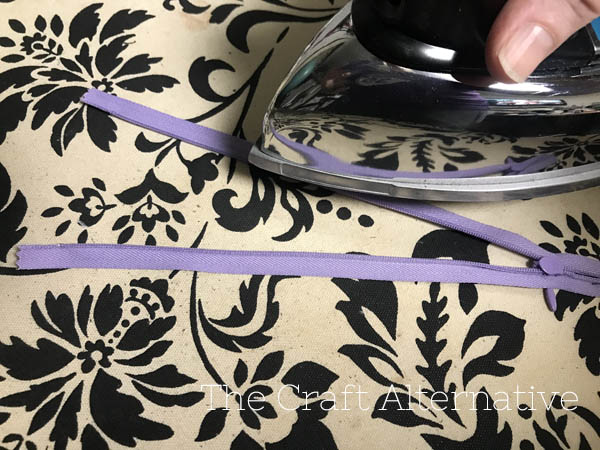
Prepare the zipper to be sewn into the seam by pressing the teeth over with an iron. Let me explain… Part of what makes the zipper “invisible” is that the tape where the teeth are located rolls to the inside. We want to be able to sew as closely to the teeth as possible so we will need to press the “roll” flat.
Lightly press the roll area so they teeth lay flat. A blast of steam is helpful but don’t burn yourself and don’t let the iron get too hot or let it sit on the teeth for too long because they can melt!
Pin the Zipper in Place
Open the zipper and pin it along one side of the garment. The right side of the zipper will face the right side of the garment. Since I use a serger, I like to follow the straight stitch line when pinning the zipper in. Attach the invisible zipper foot to the machine and stitch the zipper in place almost to the end of the tape.
Now, pin the other side of the zipper to the other side of the garment. Start as close to the end of the zipper as possible (make sure the zipper head is out of the way) and sew the zipper in place.
Close Up the Seam
Finally, remove the invisible zipper foot and reinstall the foot you normally sew with. Close the zipper, and and pin the open part of the seam together under the zipper. I find it is easier to sew from the hem up to the bottom of the zipper. Add a few back stitches to secure the seam, then clip the threads. Press the seam open, including the zipper.
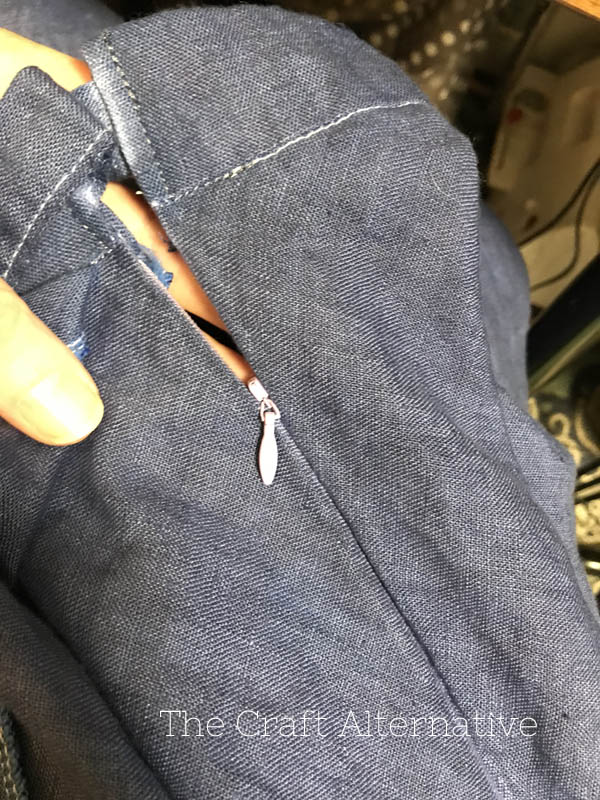
That’s all there is to sew an invisible zipper – super-easy, right? I actually like invisible zippers far more than I like traditional zippers and sometimes, I like to use a zipper in an oddball color that totally does not match just for fun! No one will ever see it and it’s a little wink I like to add to my garments. Have questions? Leave a comment below!
Originally posted 2024-08-12 13:35:26.