
How to Make a Cover for a Travel Ironing Board
Originally posted 2015-01-05 08:00:38.
Updating a Flimsy Travel Ironing Board and Give It More Rigidity!
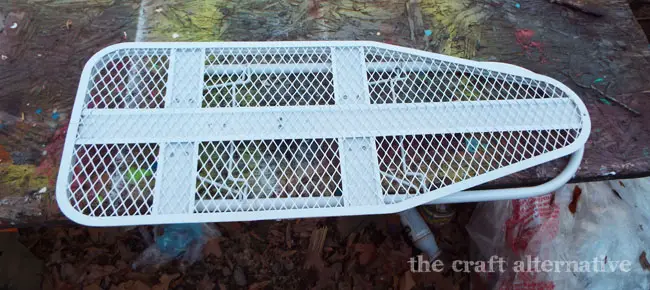
I have a small travel-size ironing board I found in the shed of a house I was remodeling. It is one of the metal types that really flexes when a lot of pressure is applied to it. It is the perfect size for projects I create using heat transfer vinyl but the flimsy surface was going to lead to a lot of problems with the vinyl! Let me show you how to make a new cover for a travel ironing board and how I gave it a bit more rigidity with a piece of plywood!

Supplies:
- 1/4″ plywood
- Spray primer and paint
- New fabric (I used printed cotton duck)
- Sew-In Thin Fleece (<– affiliate link!)
- Contrasting double fold bias tape (or make your own!)
- Thin cord for drawstring
- Cord lock
- Coordinating thread
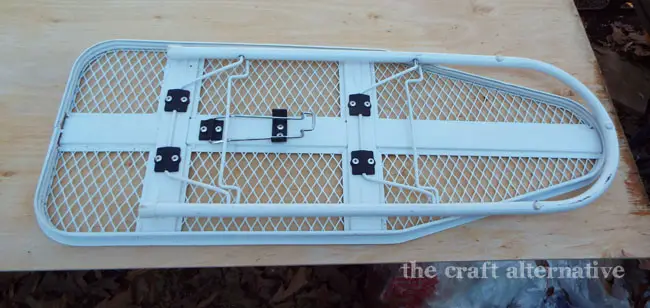
I started by removing the existing cover and the foam pad. Hang onto the old cover, though, because we’ll need it later!
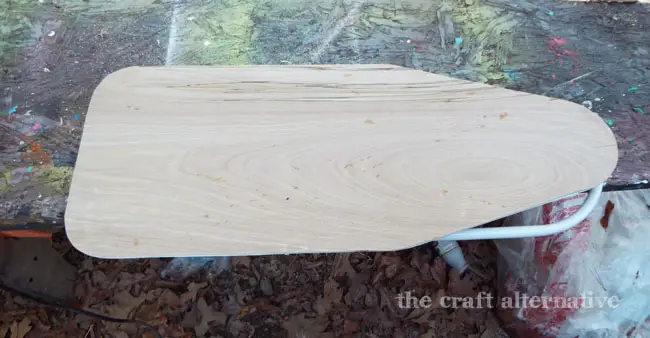
I placed a 1/4″ piece of plywood on my work table, then placed the mini ironing board on it, top side down so that I could trace around it.
I used my jigsaw to cut out the ironing board shape. (If you’ve never used one before, a jigsaw is really easy to use!)
I sprayed a coat of primer on the ironing board frame and let it thoroughly dry. Then, I sprayed the frame with two coats of spray paint. I did not photograph the priming and painting steps but I’m sure you get the idea – it is really easy! (I chose pink to coordinate with the fabric I was using for the cover!)
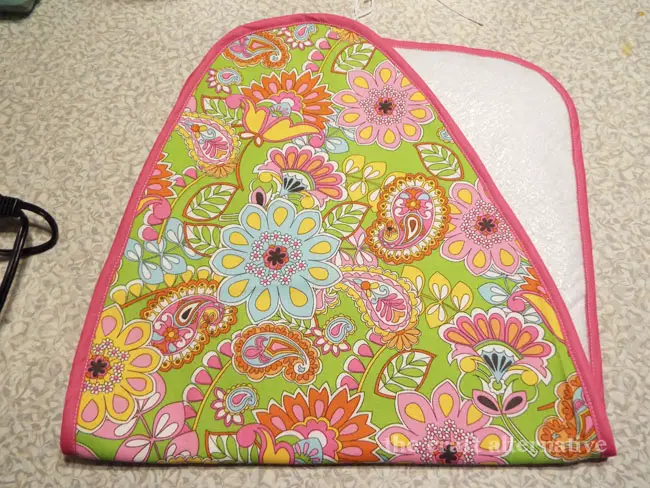
To make the cover, take the old cover and fold it in half lengthwise pressing the cover to get the wrinkles out and flatten the fold. Fold the new fabric in half lengthwise (I used a printed cotton duck) and place the old cover on the fold. Pin the old cover to the new fabric and cut out leaving at least 1/2″ around the outside edge. Now, fold the fleece in half lengthwise and place the new fabric (folded in half) on the fold and cut out.
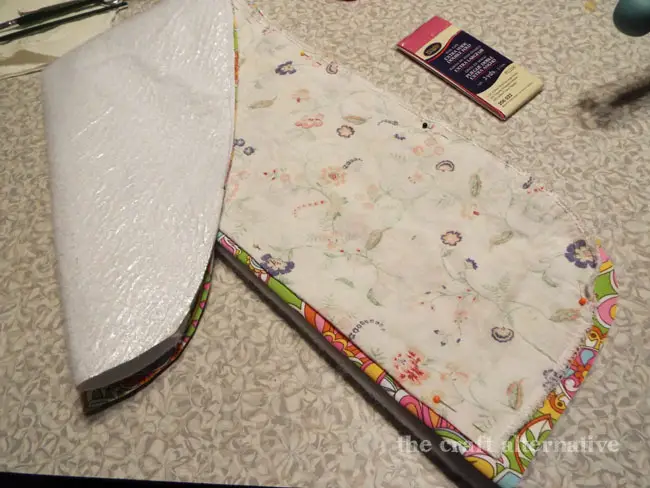
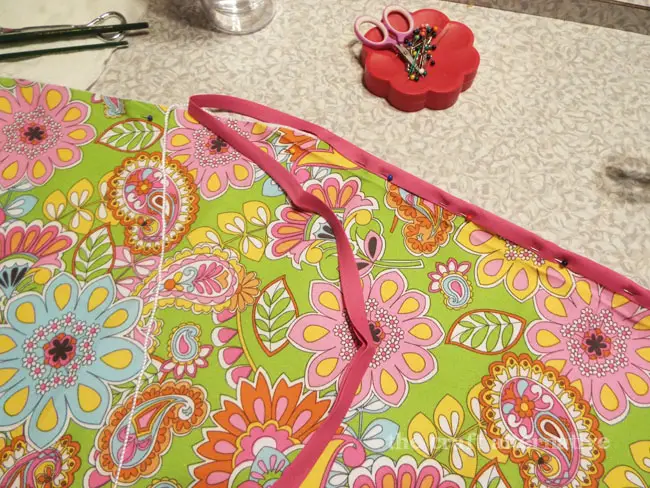
Place the cord in the fold of the bias tape and pin the bias tape around the outside edges of the fabric and fleece, treating both fabrics as one layer. Start at the bottom edge of the fabric and fleece. Stitch the bias tape in place being careful not to catch the cord in the seam!
Place the plywood on the top of the ironing board frame, then place the new cover (fleece side down) on top of the plywood. Pull the cord to draw up the edges of the cover around the plywood and frame. Thread the edges of the cord through the hole in the cord lock and release to lock the cord in place.
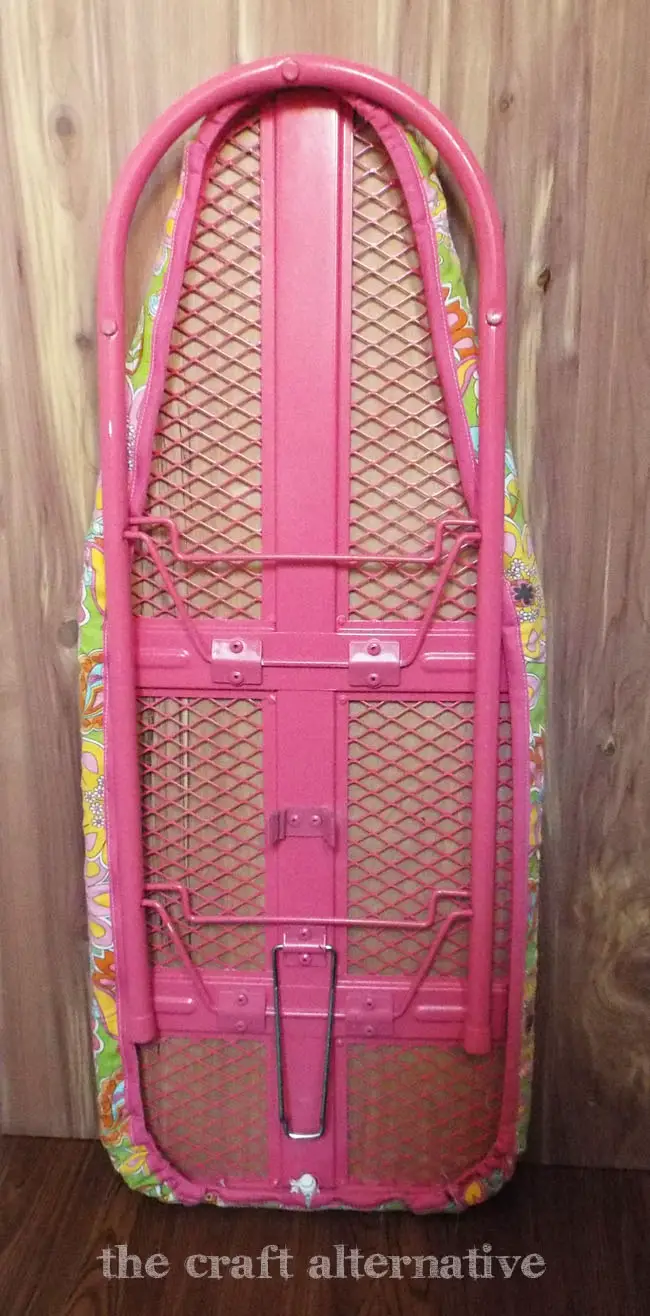
That’s it… Super-easy, right? The plywood added to the frame helps make the ironing board to be more solid, especially for my heat transfer vinyl projects! If there are any question about how to make a cover for a travel ironing board, leave a comment below!
This post contains an affiliate link. What that means is that if the link is clicked and a purchase is made, I will receive a commission!
Hi, just followed your tutorial and made a brand new cover replacing the ugly one that was on a old small ironing board that was given to me. I’m so happy with it, I should have done this job before. Thanks a lot!
So sorry for the delayed reply… That is awesome! Thank you so much – have a great day!